Setting up B2B on Shopify is now available on every paid plan. Since April 2026, the native B2B toolkit (company accounts, pricing catalogs, net payment terms, self-serve ordering) is no longer exclusive to Shopify Plus. You can set it up today on Basic, Grow, or Advanced without a Plus contract or a third-party wholesale app.
This guide walks through every step in the order that avoids the setup problems that catch most merchants off guard, starting with the prerequisite that blocks B2B from working at all if missed.
Before You Start: Two Decisions That Affect Your Entire Setup
Before you touch a single admin setting, two decisions determine your setup path. Getting these wrong means redoing configuration from scratch.
Decision 1: Blended storefront or dedicated B2B store?
A blended store uses a single Shopify store for both retail and wholesale. B2B buyers log in and see their assigned pricing and catalog. Retail visitors see the public store. This is the standard approach for most operations and works on every paid plan.
A dedicated B2B store is a separate Shopify store used exclusively for wholesale. Retail customers never see it. This option requires Shopify Plus, which unlocks a separate B2B storefront with its own domain and navigation. If you are on a non-Plus plan, you are setting up a blended store, that is not a limitation, it is simply how the feature is designed for those plan tiers.
For the vast majority of Shopify B2B setups, a blended store is the right choice and the path this guide follows.
Decision 2: Is your plan eligible?
Every paid Shopify plan, Basic, Grow, Advanced, and Plus, now includes native B2B features. If you have an active paid subscription, you are ready to proceed. Free trial stores can explore the admin areas but cannot activate a buyer experience for live customers until a plan is active. For a full breakdown of which capabilities each plan tier unlocks, the Shopify B2B on all plans guide covers the complete plan comparison.
The Prerequisite: Enable New Customer Accounts First
Before creating companies, catalogs, or anything else, B2B requires Shopify's new customer account system to be enabled. This is the single most common setup issue operators encounter, and it blocks the entire B2B experience if missed.
Legacy customer accounts, the older system using email plus password, are not compatible with Shopify B2B. Buyers must use the new customer accounts system, which authenticates via email-based login links rather than stored passwords.
How to enable it: Go to Settings in your Shopify admin, then select Customer accounts. Under "Choose which version of customer accounts to use," select New customer accounts. Save.
Once this is active, B2B buyers can receive login invitations, access their company-specific pricing when logged in, and use the self-serve ordering tools. Without it, none of the B2B buyer-facing features work, even if your companies and catalogs are fully configured.
For the official requirements and prerequisites before starting B2B setup, Shopify's requirements and considerations documentation covers the full list of what needs to be in place before going live.
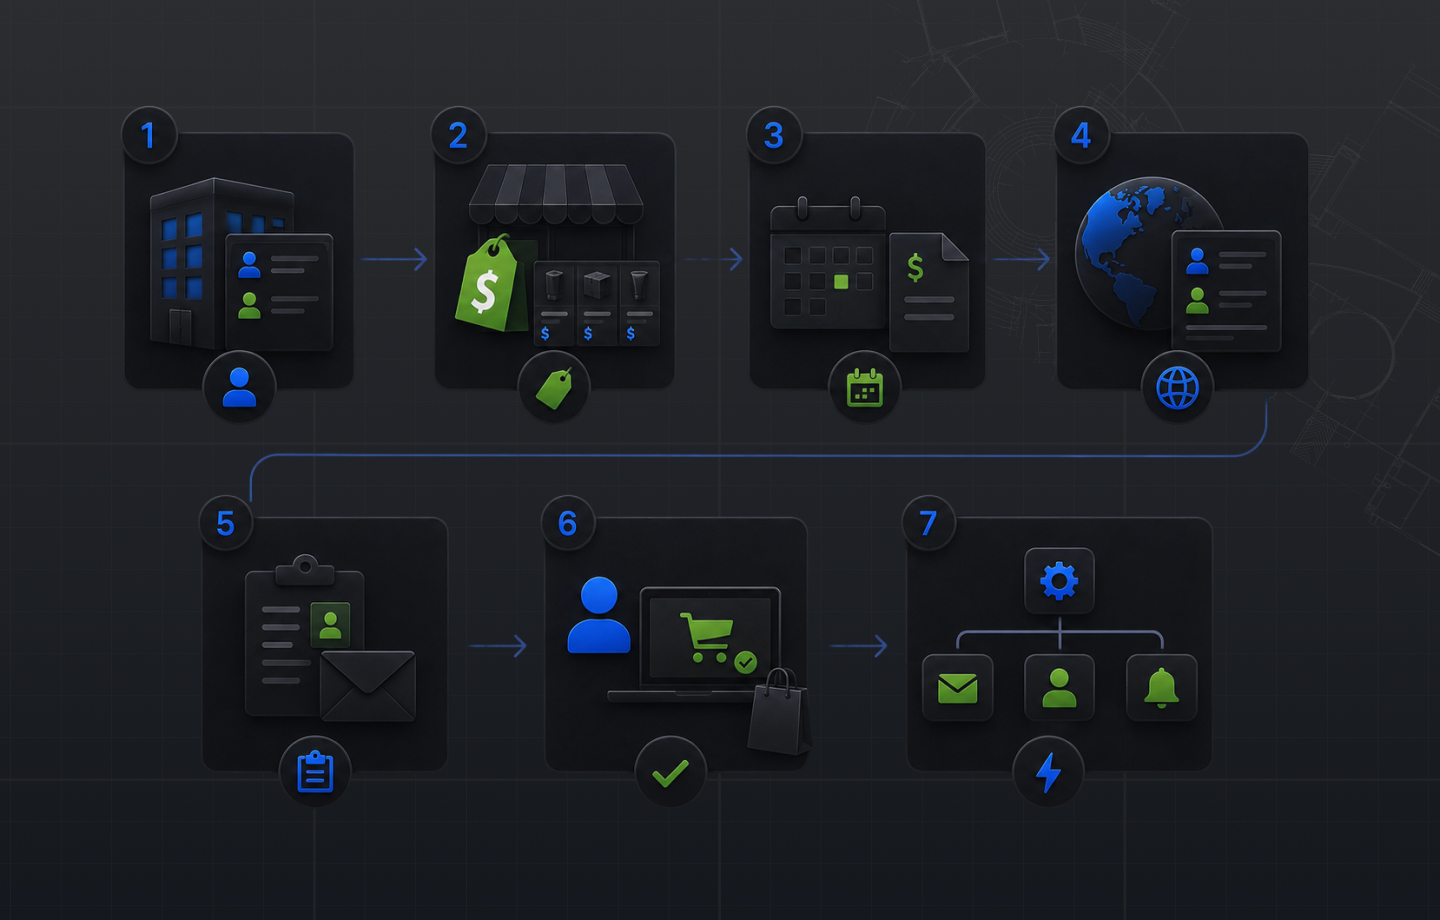
Step 1: Create Your Company Accounts
With new customer accounts enabled, your first configuration step is creating the company records that represent your wholesale buyers.
Go to Customers > Companies in your Shopify admin. Click Add company. Give the company a name, use the buyer's actual business name for clarity in your admin.
Add company locations. Every company needs at least one location, which holds the shipping address, billing address, assigned pricing catalog, and payment terms. A company with multiple offices or ship-to addresses gets a separate location for each. You can add up to 50 locations under a single company.
Add contacts. A contact is an individual buyer who can log in under this company. Add the buyer's email and name, and assign a role. The two core roles are Location admin, which allows the buyer to manage their location settings and invite other contacts, and Ordering only, which limits the buyer to placing and viewing orders. Choose based on how much control you want each buyer to have.
Set default payment terms (optional at this stage). You can set payment terms at the company level now or per-location later. Net 30, Net 60, and Net 90 are available. If you leave it blank, buyers default to payment due at checkout. You can also set terms at the individual location level, which overrides company-level defaults for that address.
Once you save the company, Shopify can send a login invitation directly to each contact from the company record. The buyer receives an email with a link to set up their access to the buyer portal.
If you have multiple wholesale accounts to create, Shopify allows bulk import via CSV from the Companies section. Use this for migrating an existing wholesale customer list rather than creating records one by one.
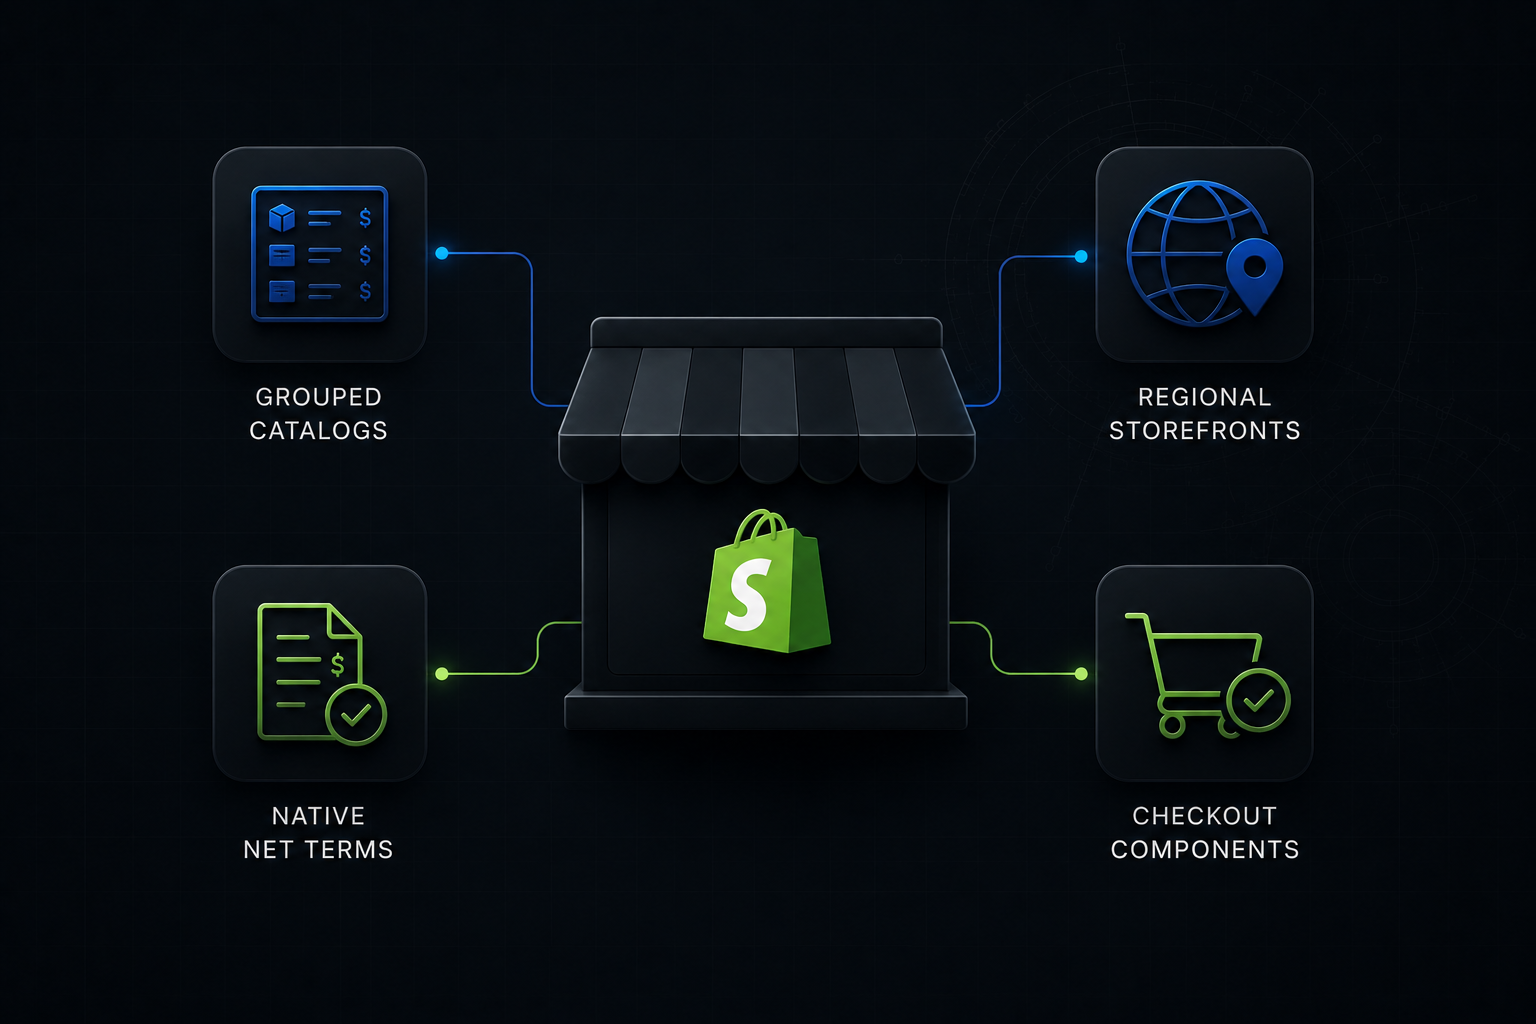
Step 2: Build Your Pricing Catalogs
A pricing catalog is a collection of products with prices set specifically for assigned buyer accounts. Every B2B buyer is assigned a catalog, they see those prices when they log in, regardless of what your public retail prices show.
Go to Products > Catalogs in your Shopify admin. Click Create catalog.
Name it clearly. If you run distributor, dealer, and direct tiers, name each catalog accordingly. You will be assigning these to company accounts, so descriptive names reduce confusion in the admin.
Set pricing for products in the catalog. You have three pricing options for each product.
Percentage off. Apply a percentage discount from the product's retail price across all products in the catalog. This is the easiest approach if your wholesale tier is a flat discount on everything. It also updates automatically when you change retail prices, which reduces maintenance.
Fixed prices. Set specific dollar amounts per variant. Use this when your wholesale pricing is individually negotiated or cost-plus calculated per SKU. This requires manual updates when costs change but gives you exact control.
Volume pricing and quantity rules. Within either pricing method, you can add quantity-based pricing (price breaks at 10, 50, and 100 units, for example) and order minimums or multiples per product. These rules are enforced at the cart level without custom code.
Assign the catalog to company accounts or locations. After building the catalog, go to the catalog's assignment section and add the companies or locations it applies to. A buyer from an assigned company or location will see the catalog pricing when logged in. A buyer whose company has no assigned catalog will see retail pricing.
On Basic, Grow, and Advanced plans, you can have up to three active catalogs. Shopify Plus removes the limit. Plan your catalog structure with this cap in mind before building, if you need four or more distinct pricing tiers, a Plus plan or a plan to consolidate tiers is needed.
Step 3: Configure Payment Terms
Payment terms control how and when B2B buyers pay for their orders. You can set these at three levels: the company, the company location, or the individual order.
To set payment terms, go to the company record in Customers > Companies. Open the location you want to configure. Under Payment settings, choose the terms for that location: Due on receipt, Net 7, Net 15, Net 30, Net 60, or Net 90.
When a buyer assigned to that location places an order, Shopify creates the order with a payment due date matching the assigned terms. The buyer completes checkout without paying immediately. Shopify sends automatic payment reminders as the due date approaches.
Purchase order numbers are collected automatically on every B2B checkout. Buyers see a PO number field at checkout. Whatever they enter flows through to the order record in your admin and can be included on invoices and packing materials. This is automatic once the buyer is shopping under a company account, you do not need to configure it separately.
Draft orders for rep-assisted purchasing. Your team can create orders on behalf of buyers directly from the Shopify admin using draft orders. Go to Orders > Drafts, create a new draft, assign it to a company and location, apply the appropriate catalog pricing, and send a payment link or invoice. The buyer pays from the link; the order is created when payment is received or, for net-terms buyers, when the draft is confirmed.
Step 4: Set Up B2B Markets
B2B Markets is the mechanism that connects pricing catalogs to the buyer-facing experience, specifically, what a buyer sees when they land on your storefront and log in. Setting up a B2B market correctly is what makes catalog pricing visible to the right buyers.
Go to Settings > Markets in your Shopify admin. You can add B2B functionality to an existing market or create a new market specifically for your wholesale segment.
In the market settings, add company locations to the market's "Includes" section. This is where you connect a market to the specific company accounts or locations that should experience it. Without this step, buyers log in but do not see their catalog pricing, the market connection is what activates the B2B pricing display.
Assign your catalogs to the market. Within the market settings, you can attach pricing catalogs directly. This layer of configuration is what makes catalog pricing appear for buyers in that market when they are logged in.
For the complete blended-store setup sequence from Shopify's own documentation, including how markets connect to catalogs and company locations, Shopify's blended store setup checklist covers every step in their recommended order.
If you are not selling internationally and all your wholesale buyers are in the same region as your retail customers, your market configuration is minimal, you may only need to add your wholesale buyers to your primary market. For international wholesale with currency or tax differences, a dedicated B2B market with the relevant regional settings is the right approach.
Step 5: Set Up the Wholesale Account Registration Form
Once your B2B infrastructure is configured, you need a way for prospective buyers to apply for access. Without a registration process, wholesale accounts can only be created manually by your team.
Install the Shopify Forms app from the Shopify App Store. Shopify Forms is free and built specifically for this.
Create a B2B account request form. Add fields for the prospective buyer's company name, business type, annual purchase volume, and any other qualification criteria your sales team needs. The form submission notifies your team.
Review and approve from your Shopify admin. When a submission comes in, your team reviews it, creates the company account manually, adds the contact, assigns the catalog and payment terms, and sends the login invitation. The entire process, from form to live buyer account, can be handled from the Shopify admin without external tools.
This flow is the recommended approach for any B2B operation that does not want unapproved buyers accessing wholesale pricing. It also works well for generating qualified inbound sales leads from buyers who are not yet customers.
For operations with a known, existing wholesale customer list, the form may be less relevant, you are importing existing accounts rather than building an inbound funnel. In that case, skip directly to CSV import from the Companies section.
Step 6: Test the Complete Buyer Experience Before Going Live
Before opening your B2B setup to actual buyers, run through the complete buyer journey from a test account to verify every step works as expected. This is where most configuration errors surface.
Create a test company account with your own email address as the contact. Assign a catalog and net payment terms.
Log in as the buyer. Open your store in a new browser session (or an incognito window). Log in with the test buyer email. Confirm that you receive the login link, can access the store, and see the catalog-specific pricing on product pages rather than retail prices.
Add items and go through checkout. Confirm that the PO number field appears at checkout, that the net payment terms allow you to complete the order without immediate payment, and that the order record in your admin shows the correct company, location, pricing, and payment due date.
Test the quick order list. In the buyer's account area, the quick order list is the spreadsheet-style bulk order form. Confirm it loads, that SKU lookup works, and that products from the catalog appear with the correct catalog pricing.
Verify reorder from history. If you have existing order history for the test account, confirm the reorder flow works and pulls the correct products at catalog pricing.
If any step in this flow does not work as expected, the most common causes are: new customer accounts not fully enabled (go back to Settings > Customer Accounts), the company location not assigned to a market (go to Settings > Markets), or the catalog not assigned to the company location (go to Products > Catalogs and check the assignment). All three of these are easy to miss and quick to fix once identified.
Step 7: Configure Shopify Flow for B2B Automations
With the core setup working, Shopify Flow is worth configuring before you scale your wholesale buyer base. The automations that matter most for B2B operations are low-effort to set up and high-impact to run.
Company onboarding automation. Create a Flow that triggers when a new company is created in your admin. Actions: assign a default catalog, apply default payment terms, send a welcome email to the primary contact, and notify your sales team in Slack or email. The entire new-account setup runs automatically rather than requiring your team to manually complete each step for every new buyer.
Order flag automation. Create a Flow that triggers on B2B order creation and flags orders above a certain dollar value for manager review. Useful for new accounts, unusual volume, or orders that exceed a buyer's typical purchase size.
Reorder reminder. Create a Flow that triggers when a company has not placed an order within a set number of days. Sends an automated email to the buyer contacts prompting a reorder. Effective for accounts with predictable, repeating order cycles.
Shopify Flow is included on every paid plan. None of these automations require Plus or third-party tools.
What Setup Does Not Cover: ERP Integration and Quoting
The steps above get your Shopify B2B storefront working. What they do not cover are the two most operationally significant layers for wholesale businesses running at scale.
ERP integration. If your pricing, customer data, inventory, and order records live in NetSuite, SAP, or Microsoft Dynamics, your Shopify storefront needs a reliable sync to stay accurate. Customer pricing from your ERP needs to reflect in Shopify catalogs. Orders placed in Shopify need to create records in your ERP. Without this sync, your storefront pricing goes stale, your operations team manually reconciles orders, and the efficiency benefits of self-serve B2B are largely offset by back-office correction work. Uncap Connect is built specifically for this use case, connecting Shopify B2B to the major ERP systems with real-time sync for orders, pricing, and customer account data.
Quoting and RFQ workflows. The setup above handles buyers who know what they want and are ready to place an order. For operations where buyers submit pricing requests, where reps build proposals, or where pricing is negotiated before a purchase order is confirmed, the native Shopify B2B setup does not cover that sales motion. You need a quoting layer on top, either a third-party quoting app or a custom implementation. For a full breakdown of what Shopify B2B does and does not handle for suppliers, the complete Shopify B2B features guide covers where the native feature set ends.
Common Shopify B2B Setup Problems and How to Fix Them
These are the issues that come up most often after initial setup. Knowing them ahead of time saves troubleshooting time.
B2B buyer sees retail pricing after logging in. The most common cause: the company location is not assigned to a B2B market. Go to Settings > Markets, open the relevant market, and confirm the company location appears under the market's company locations. Second cause: new customer accounts were not enabled before the buyer's account was created. Check Settings > Customer Accounts.
Catalog is not visible to the buyer. The catalog may not be assigned to the buyer's company or location. Go to Products > Catalogs, open the catalog, and verify the correct company accounts and locations appear under the Assignments section.
Net payment terms are not applying at checkout. Payment terms are set per company location, not globally. Go to Customers > Companies, open the relevant company, then open the location, and confirm terms are set under Payment settings for that location.
Buyer's login invitation email was not received. Check that the buyer email was entered correctly in the contact record. Check your Shopify notification settings to confirm the invitation email is enabled. If using a custom domain email, check spam folders on the buyer's end.
Catalog limit reached on non-Plus plan. You can have up to three active catalogs on Basic, Grow, and Advanced plans. If you need to add a fourth, either consolidate an existing catalog by merging pricing tiers, or assess whether Plus economics are justified. The Shopify B2B vs Shopify Plus guide covers when Plus adds the most value for wholesale operations.
Getting Your Shopify B2B Setup Right From the Start
The configuration above sets up a working B2B buyer program. The quality of that program depends on how accurately your catalog pricing reflects what your buyers should see, how reliably your payment terms reflect your actual agreements, and how well the storefront connects to the systems your operation depends on.
As a Shopify Platinum Partner since 2013, Uncap has completed more than 380 B2B commerce implementations for manufacturers, distributors, and wholesalers. The setup steps are not where most operations run into problems, it is the integration layer, the data accuracy, and the back-office connection that determine whether a B2B program runs well or requires constant manual correction.
If you want an expert review of your B2B setup, help with ERP integration, or a complete build from scratch, talk to our experts about your wholesale channel.